
Here’s a new recipe from featured guest blogger, Karen Hix! You may have seen Karen on my Facebook Page or our new Facebook Group! Please be sure to read all about her at the end of this post, after you make her delicious recipe!
Take it away Karen!!!
One of the summer veggies I always love to eat is an artichoke. Problem is, since I’ve gone plant based with no oils, I can’t eat them the way I used to … melted butter, or mayonnaise with lemon. So I came up with this Lemon Garlic Sauce (two of my favorite ingredients!) which I’ve found to be totally versatile! I now have a healthy dipping sauce for my artichokes and it makes a yummy dip or topping for steamed veggies as well … But my second favorite way to eat this is over a veggie version of no-eggs benedict … toasted muffin, topped with a grilled portobello mushroom, sliced tomatoes & avocados and drenched in this sauce. Yummy! I love lemon and garlic, so bringing these together is pure paradise. Hope you enjoy!
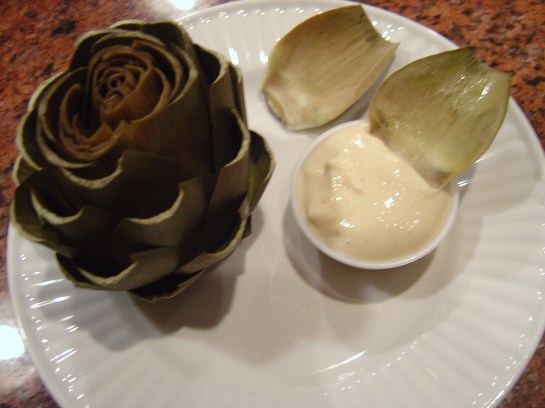
Garlicky Lemon Dipping Sauce!

Trim and steam your artichokes, approx 20-30 minutes
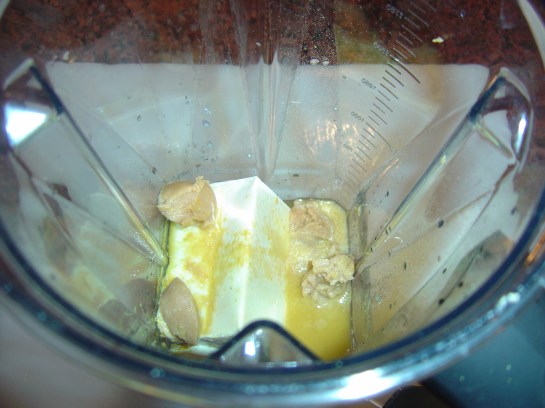
Combine all sauce ingredients in a blender and blend well.
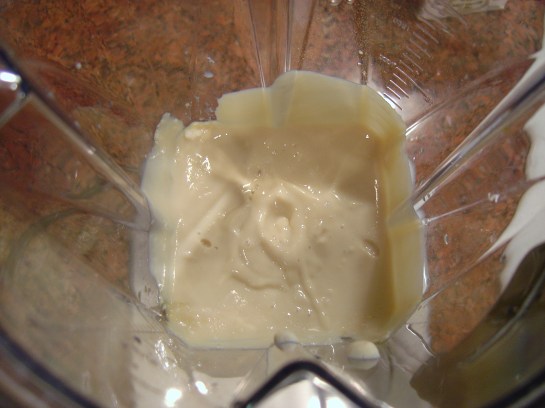
Ready to serve!
Garlicky Lemon Dipping Sauce!
Hmmm a little about me … well, I’m a manicurist by day, and a major foodie who loves to cook. I’ve always taken a huge interest in health … and always thought I ate healthy … until one day when I watched the movie “Forks Over Knives”. That movie, along with the book “The China Study” by T. Colin Campbell opened my eyes to a new lifestyle of healthy eating. I actually have a birthdate for going plant-based of 3/30/12 and have never looked back. I lost 10 lbs within my first 2 weeks … all because I realized my problem … was with olive oil. Now the olive oil is gone from my cooking days … and it was a lot easier than I thought it would be!
With my newfound dietary changes, I became addicted to researching recipes on the internet, and found April on her “Kid Tested Firefighter Approved” website … which is by far my favorite source for plant-based recipes! I have loved every recipe of hers that I’ve tried (and I’ve tried almost every one she’s posted!) and tell all my friends about her delicious and easy recipes. Now they’re addicted to her recipes too 🙂
I have ventured out in trying out a few recipes on my own, mostly trying to recreate some loves from my pre-plant based lifestyle. That’s how this recipe evolved. I told April about it, and she’s graciously asked me to share it with her fans. This sauce kinda reminds me of a garlicky hollandaise sauce … I hope you enjoy 🙂


